The file manager tool is used to manage the downloads and files used within your website.
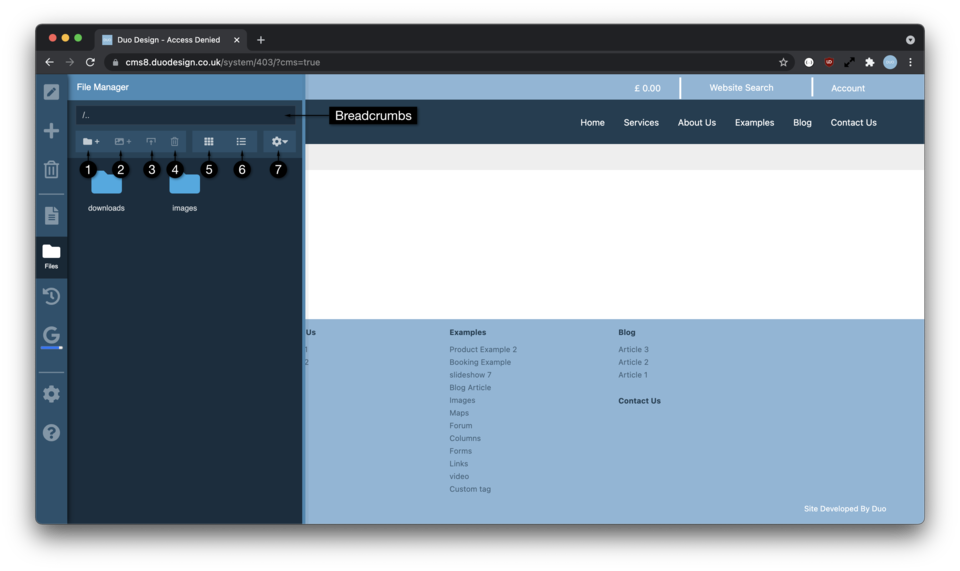
Main File Manager Toolbar
Add New Folder
Add Stock Image
Upload File
Delete Selected File
Grid View
List View
Options
Navigation
To navigate around the file manager, you can double click on the folders, moving back up a level requires you to click on the breadcrumbs.
Adding a New Folder
New folders can only be added once you have entered either downloads or images. We separate the folders as images and downloads have specific requirements.
The downloads we index as part of the website search feature. This means users to your site can also get documents to appear as part of the search results.
The images are automatically optimised for users of your site. Once uploaded we can convert to more optimised format (eg webp) and create a range of scaled sizes depending on the device your users use when viewing the page.
A new folder can be created using the toolbar above (1) or by using the right click menu. Once created, you can type and name and press ‘enter’ to confirm, or press ‘escape’ to cancel the creation process. Any characters typed into the folder name which are not web friendly will be converted to underscores. If a name already exists, your new folder will have a number appended to the end.
Adding Stock Images
New free stock images can be added to your images folder by clicking in the toolbar (2) or using the right click menu while inside a folder in images.
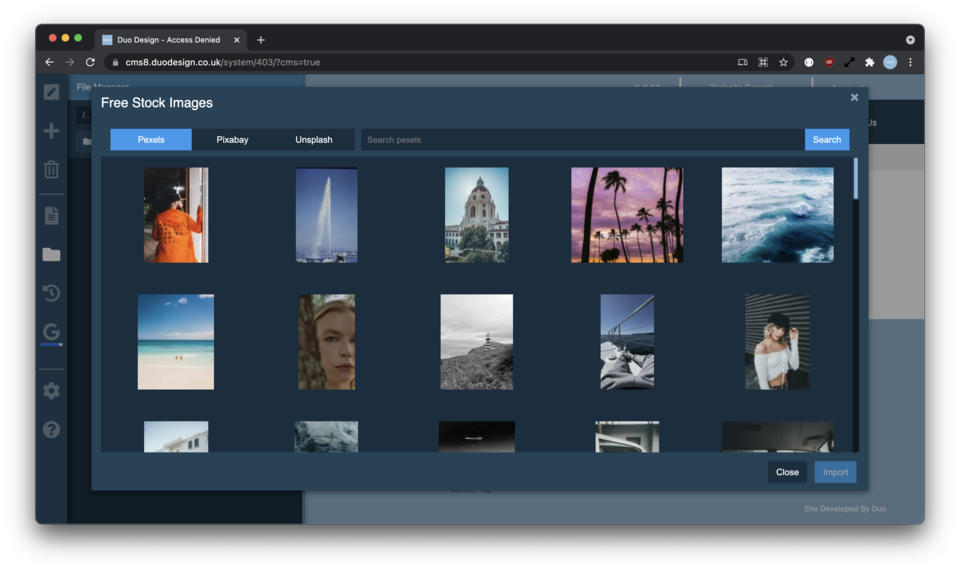
Once clicked, a new window will appear showing a selection of images. The toolbar across the top shows a list of image providers (currently Pexels, Pixabay and Unsplash). There is also a search bar. Enter a search term and press enter or click search to update the grid of images.
Once you find one you like you can select it and click the import button at the bottom right.
The stock image window will then close and the new image will appear in your file manager. The file should then be renamed to something more meaningful (see below)
Uploading Files
Files can be uploaded by clicking on the upload button in the toolbar (3), or dragging and dropping files into the file manager window.
To keep things organised we highly recommend creating folders for each section of your site adding stock images and uploads to them, which should help you locate them more quickly in the future.
Deleting Files
Files can be deleted individually, or multiple at a time using the delete button in the toolbar (4). You can also quickly delete any file by right clicking on it and selecting delete. Files become unaccessible once deleted, but can be recovered for up to a week after they have been deleted (see “Restoring Files” below).
View as Grid
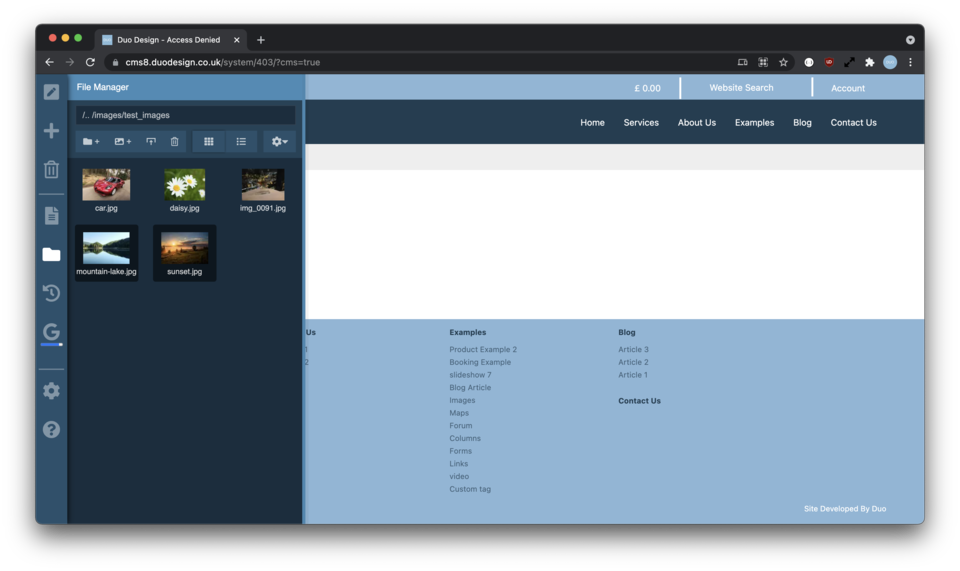
Grid view shows files in a grid with the filename under each one. This view can be activated by clicking the grid icon (5).
Due to the space limitation filenames are shortened to fit within the grid.
Grid view is the best way of viewing images as the image is often a lot more descriptive than their file names.
View as List
List view shows files in a vertical list with much smaller image previews. It can be activated by clicking the list icon (6).
The list of images includes the full filename and the file size in brackets after each filename. This is useful especially when working in the downloads section.
Options Menu
The options menu (7) contains the remaining options that can also be accessed with the right click menu. Right click isn’t available when using touch based devices, so we duplicate those options here.
Restoring Files
If you delete a file by mistake, you can right click (or use the options menu) and select show deleted. Deleted files and folders will be displayed with a red outline.
If you select a deleted file, the delete icon in the toolbar (4) will change to a recycle icon.
Clicking the recycle icon will restore the file.
You can then select ‘Hide Deleted’ with the right click menu (or options menu), to hide again any deleted files.
As mentioned above, deleted files are typically kept within the system for up to 7 days after you first delete them.
Double Clicking Files
As mentioned above, double clicking folders opens them. Double clicking images opens them in the image editor and double clicking downloads downloads them. For more information on the image editor click here.