 CMSDocumentation

Website administration
Users
Users is where you manage everyone who can sign in to your website: the people who edit it, and members who sign in to see private pages or buy things. This chapter covers the people. Groups and organisations have chapters of their own.
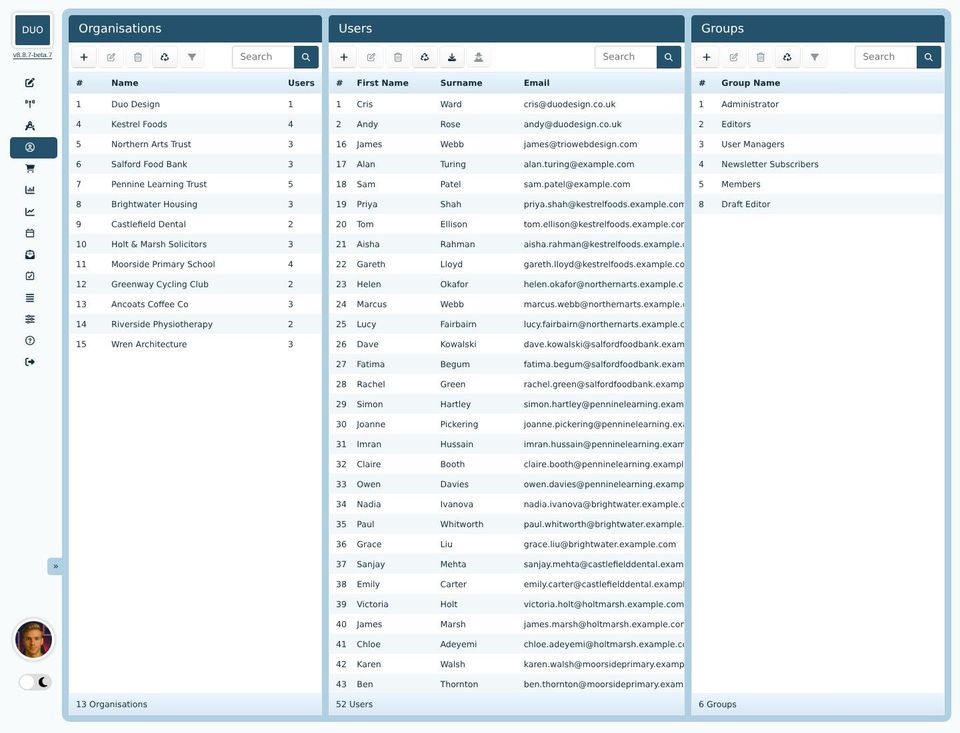
The screen has three lists: Organisations, Users and Groups. They sit side by side when the admin menu is folded down to its icons, using the arrows at the bottom right of the menu. With the menu open, Users is on top.
Type in a list's search box to find someone by name or email address.
The Users list
Click a person to choose them. The buttons above the list work on whoever is chosen.
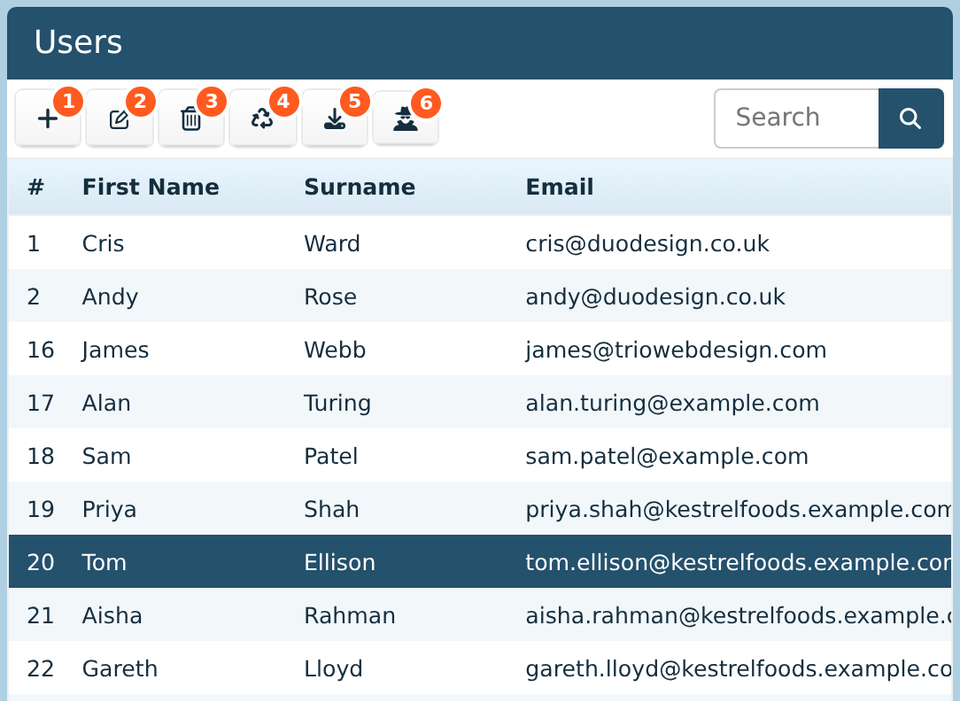
Add opens an empty window for a new person.
Edit opens the chosen person. Double-clicking them does the same.
Delete removes the chosen person, after you confirm. See Deleted people.
Deleted users lists people deleted recently, so you can bring them back.
Download saves the list as a spreadsheet. See Downloading the list.
Impersonate shows the website as the chosen person sees it. See Seeing the site as someone else.
A person's details
Editing someone opens a window with tabs along the top. The numbers in brackets show how many groups, orders and sign-ins they have.
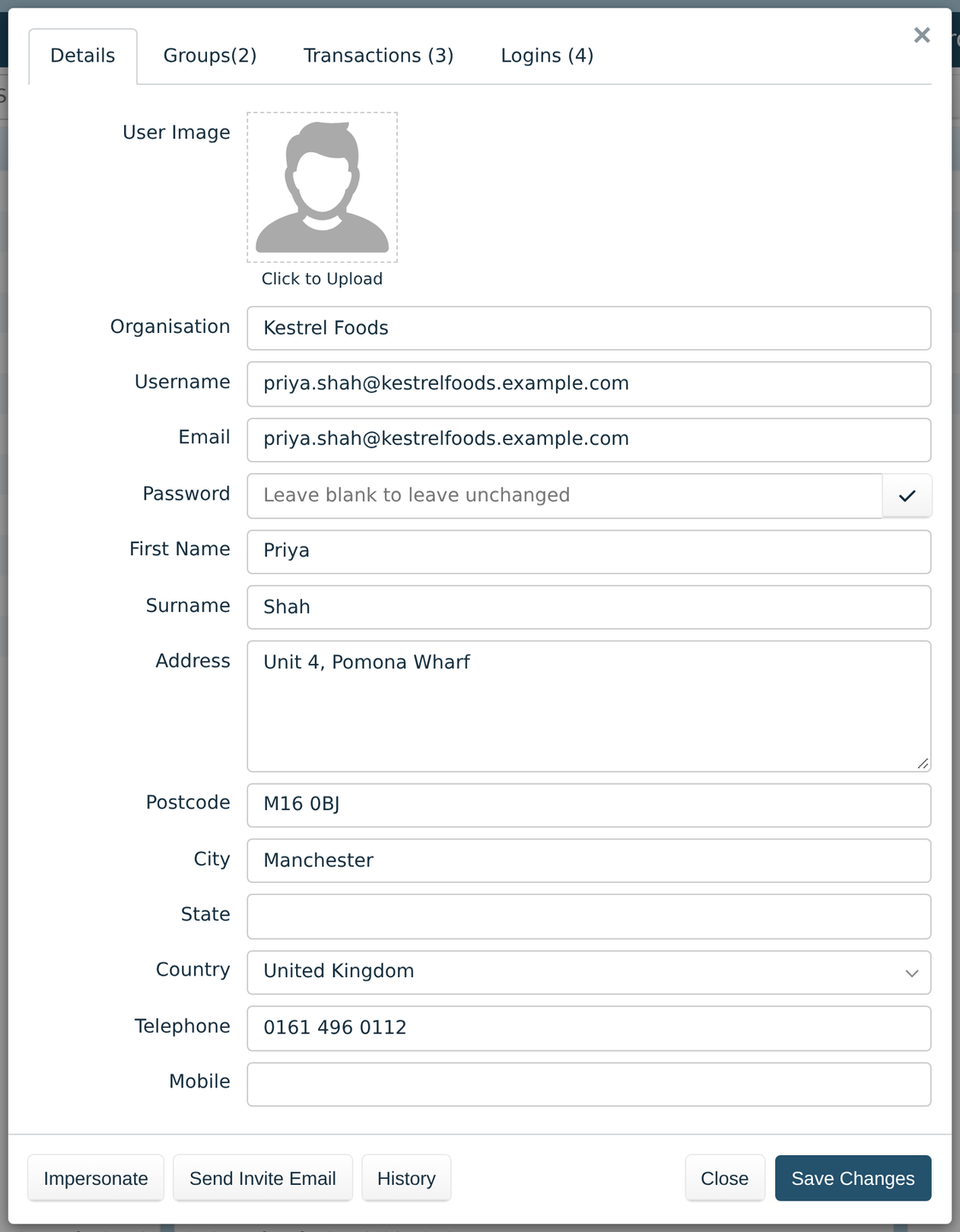
Details holds their name, contact details and sign-in:
User Image is their picture. Click it to upload one.
Organisation is the business, school or club they belong to. See Organisations.
Username is what they type to sign in. It's usually their email address.
Password sets a new password for them. Leave it blank to keep the one they have.
The rest is their name, address and phone numbers.
Click Save Changes when you've finished, or Close to leave without saving. The date they were added and last changed is under the buttons.

Impersonate shows the website as this person sees it.
Send Invite Email emails them a link to choose their own password and sign in. The link stops working after a few days. Only some websites have this button.
History lists every change made to this person, and who made it.
Save Changes.
Groups
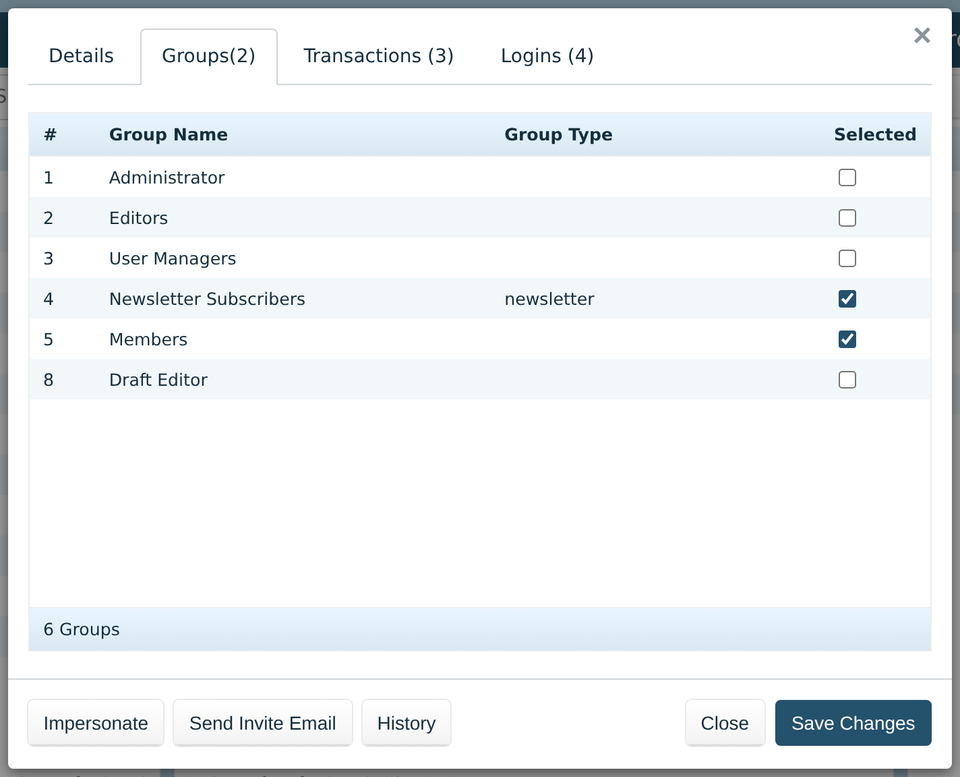
Tick the groups this person belongs to, then save. Groups decide which private pages they can see, and what they can change in the editor and the admin. See Groups and permissions.
A group you can't tick is locked. Only someone already in it can add people.
Transactions
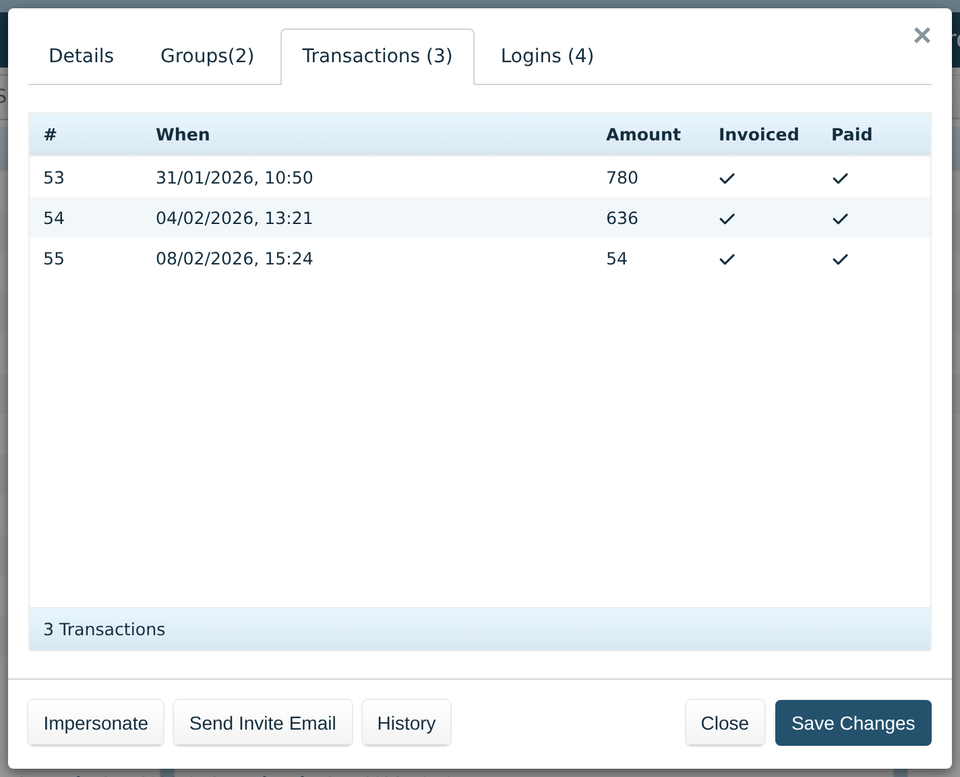
Lists everything this person has bought on your website, with the date, amount, and whether it's been invoiced and paid. It's only there if your website has a shop.
Logins
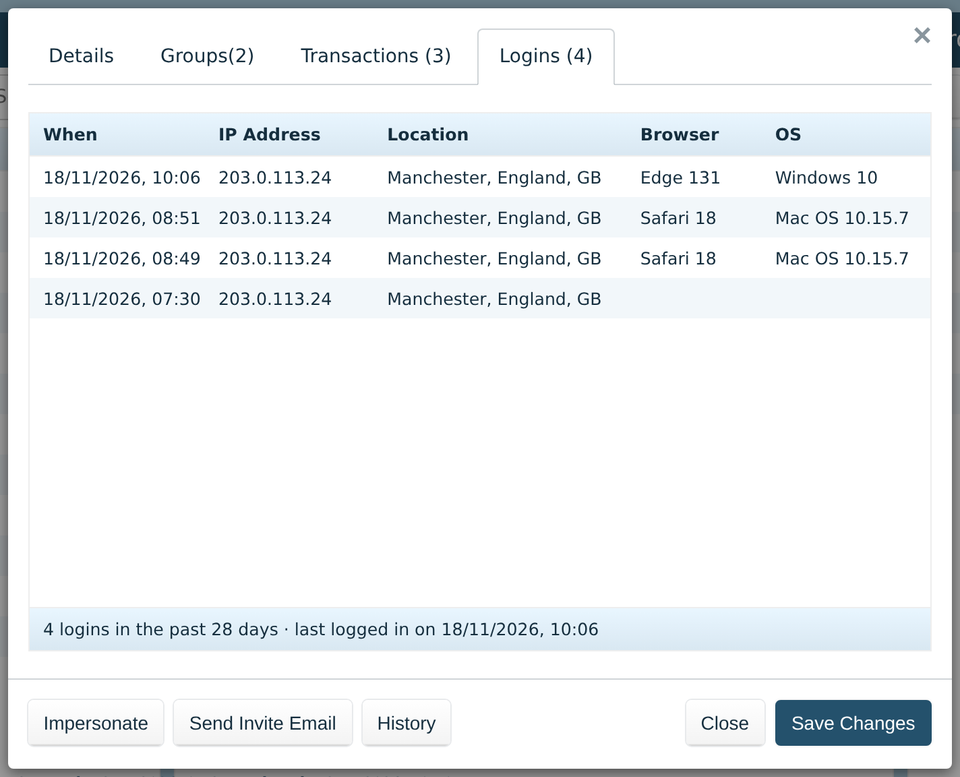
Lists when this person signed in over the past 28 days, roughly where from, and with which web browser. It helps when someone says they can't sign in, or that something doesn't work on their phone.
The place comes from their internet connection, so it's often the nearest big town rather than where they really are.
Some websites also have a Newsletters tab, which lists the newsletters this person has been sent, and an API Keys tab for connecting other software.
Adding someone
Click Add above the Users list.
Fill in their name and email address, and a username. Give them a password, or leave it blank and send them an invite once they're saved.
Click the Groups tab and tick their groups. A member who should see private pages usually goes in Members.
Click Save Changes.
People who sign up on your website add themselves, and go into a group chosen by whoever set up the website. You only need to add people by hand if they can't sign up, or need more than a member can do.
Changing several people at once
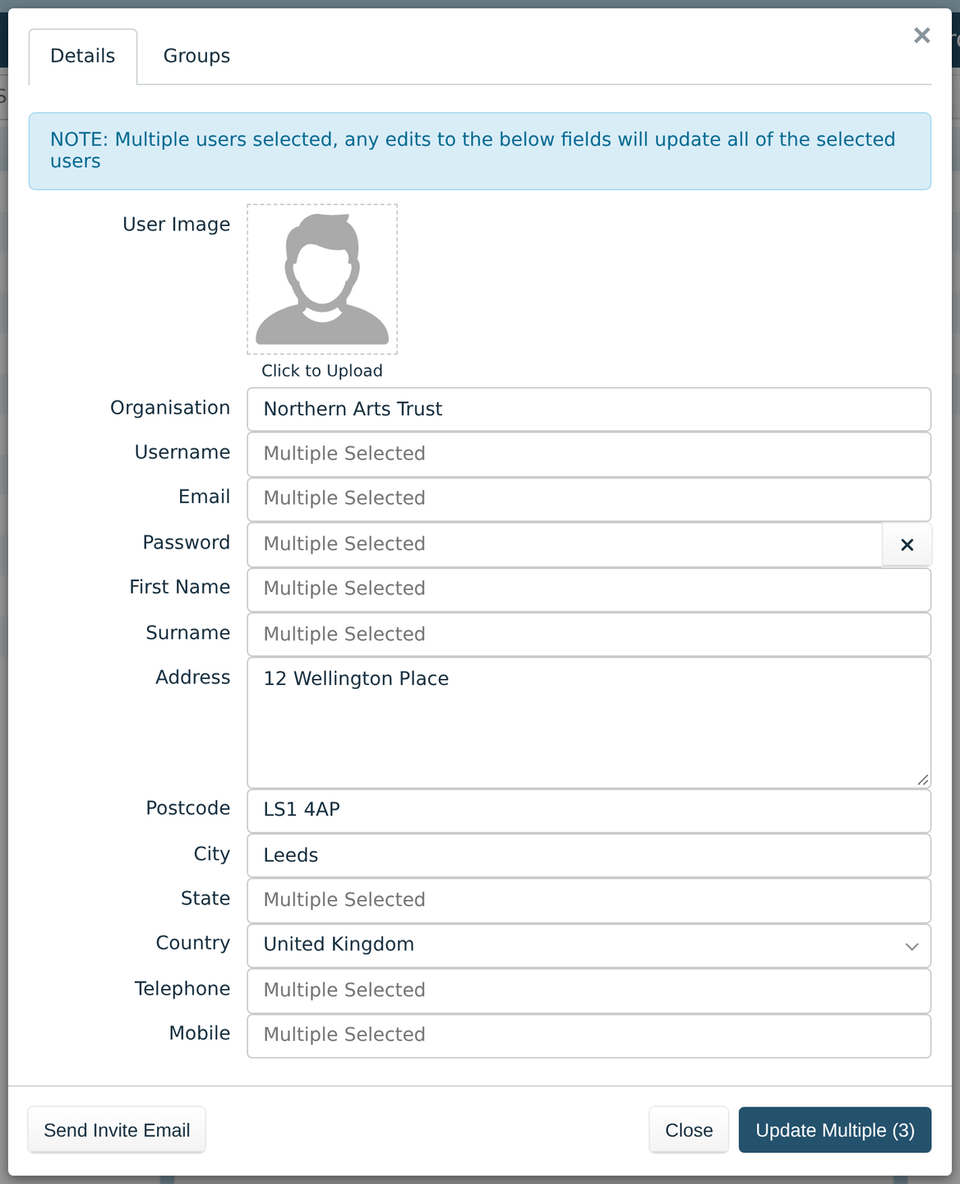
Hold down Ctrl (Cmd on a Mac) and click people to choose more than one, then click Edit. Boxes that differ between them say Multiple Selected.
Whatever you type or tick is given to all of them when you click Update Multiple. Boxes you leave alone stay as they were. It's a quick way to put several people in a group, or move them to a new organisation.
Deleted people
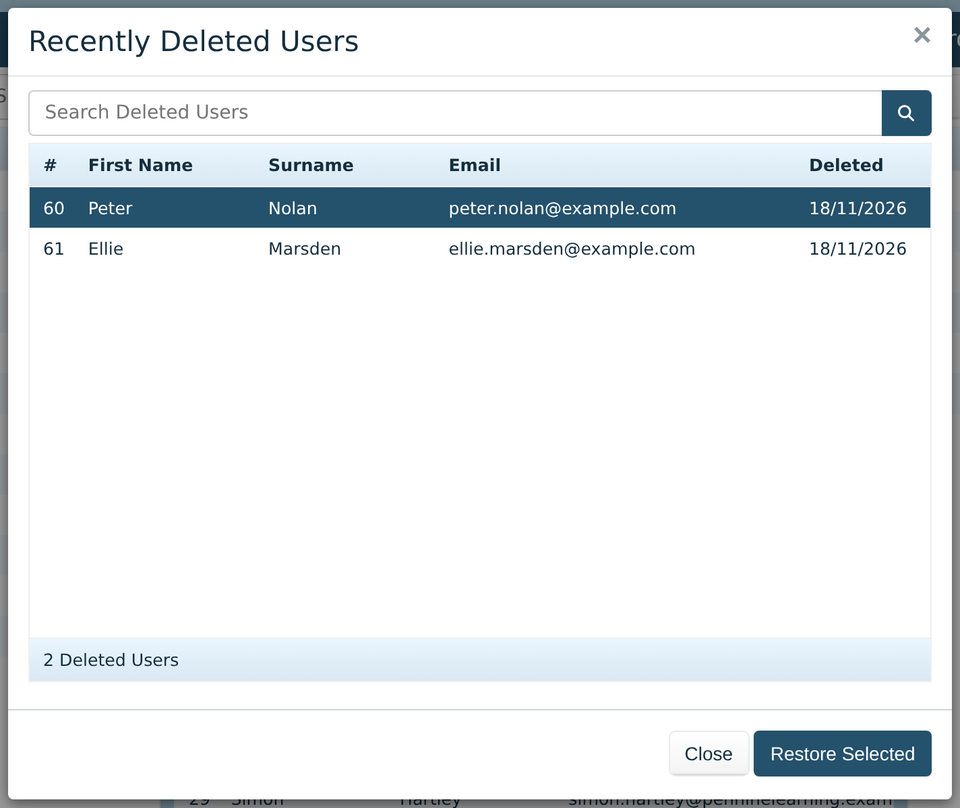
Deleting someone stops them signing in, and takes them off the list. Their orders and sign-in history are kept.
To bring someone back, click the Deleted users button above the list, choose them and click Restore Selected.
Downloading the list
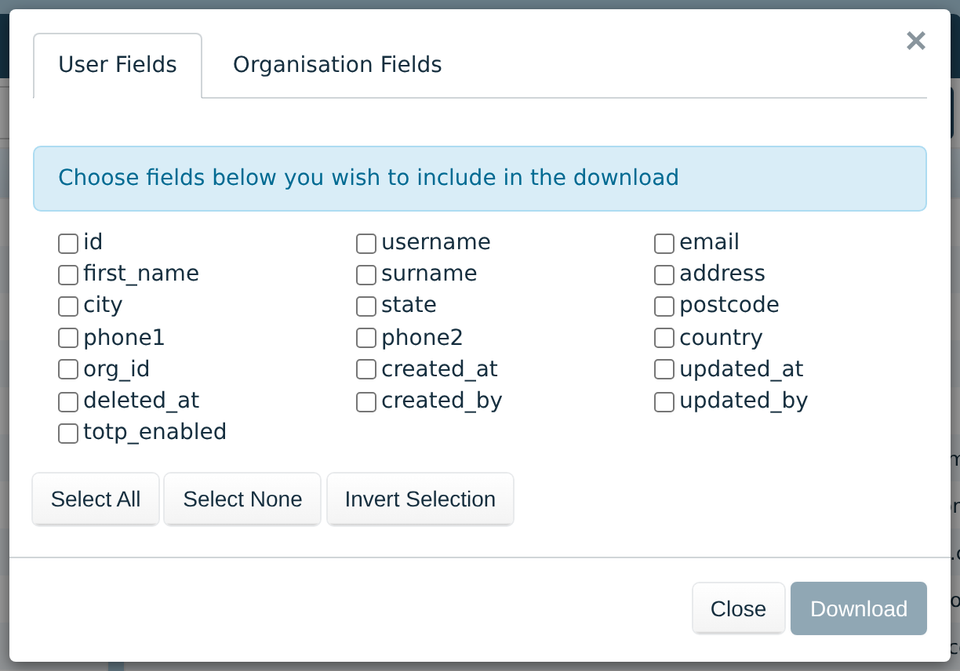
Download saves the people in the list as a spreadsheet file. Tick the details you want on User Fields, and any details of their organisation on Organisation Fields, then click Download.
It downloads everyone, unless you filter the list by an organisation or a group first. Then it downloads just those people. Typing in the search box doesn't change what it downloads.
The file holds people's personal details. Keep it somewhere safe, and delete it when you've finished with it.
Seeing the site as someone else
When someone says they can't see a page, or something looks wrong to them, you can see the website exactly as they do. Choose them and click Impersonate, either above the list or in their window. The website opens, signed in as them.
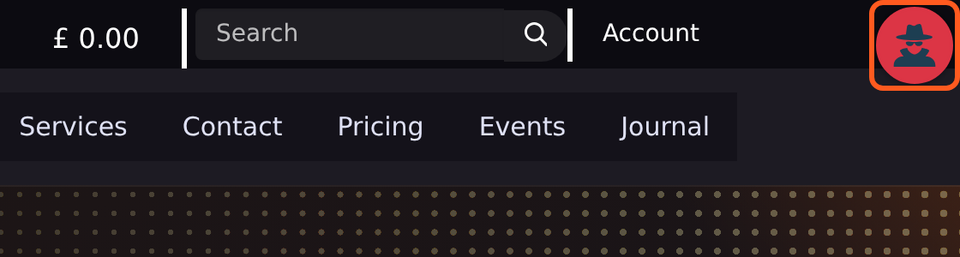
While you're impersonating, a red badge shows at the top right of every page. Click it to go back to being yourself. Anything you do in the meantime, such as buying something or changing a password, happens as that person, so just look.